Stratford, CT Kitchen Remodel
Kitchen Renovation in Stratford Connecticut
Now kitchens can be very deceptive. When you’re in a show room at any location, you’re looking at a finished product. Now you as a consumer are envisioning this kitchen in your home kitchen remodeling ct. The transition from ordering all these components to the install in your home is quite another. If you take a close look at how cabinets are manufactured, boxed and shipped to your location, you’ll see that all these components are in many many different boxes.
This Stratford Connecticut kitchen you are looking at here took up an entire garage bay, and took 3 hours to unpack and identify all the parts for their placement in the new kitchen. Each part has to be inspected for damage which is quite common. Any damaged parts need to be phoned in for replacement immediately so that were not delayed any longer than we must be on the project. We always try to have all the kitchen components on the job site before we start any construction just for this reason.
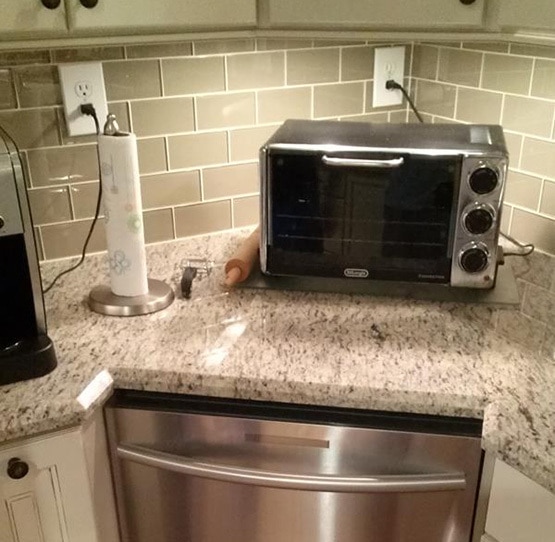
Regardless of what color or style cabinetry you chose, cabinetry will have to be properly mounted to the walls straight & level, and the same scenario is required for the base cabinets. Factory type cabinetry only offer so many standard sizes for an application. Now take a close look at the crown molding set up on this particular kitchen. You can’t see it, but we actually raised the top of these cabinets 1 inch to accommodate the crown molding detail for a much better esthetic appearance. Now crown molding has to be cut & fit into place and NAILED in place. Now in the process of nailing, nails almost always leave a hole that needs to be filled. This creates a problem on the finish of the cabinets that needs attention. ADCS has a great selection of cabinets when you choose to do your kitchen refacing in CT with us.
When we ordered these cabinets, we also ordered a pint of finish paint from the factory so that we have proper touch up material for any nail holes or any other discrepancies that might have arose during our installation. Now we also can’t just take that material from the can and touch it up with a paint brush! We will always duplicate HOW the factory provided that finish for these tasks, so that the repairs are identical to what the factory finish is. This how we create a perfect kitchen for you. There is a TON of detail work that goes into a kitchen replacement project that you would never imagine goes on. This is where a lot of installers get into to trouble, because they were simply unprepared for the little things that mean so much, because you’re expecting a perfect kitchen just like what you saw in the show room where you purchased the kitchen.
Good use of Tight Space
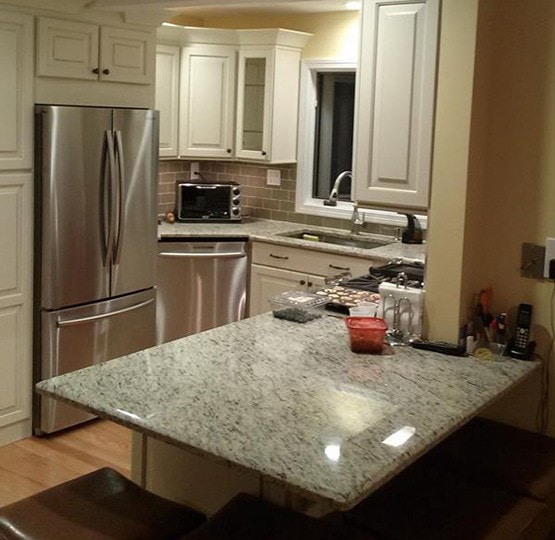
If you take a look at the 2nd picture down, here you can see a nice example of a good use of tight space. Instead of a lazy-susan type cabinet that would usually go into this space, we installed a dish washer. If you look at he cabinetry surrounding this unit, you’ll notice is was custom built for this installation out of the same material the cabinets were manufactured with. We did this simply by ordering extra material to build this unit that surrounds the dishwasher.
Another quick note; If you look at the lower part of the upper cabinet, you’ll see how much room was available to mount the crown mold to, which happens to be the same on the top of the cabinet which why we added an inch of material to the upper cabinet which made it look a lot better!
The Benefits of Early Planning on your Kitchen Remodel
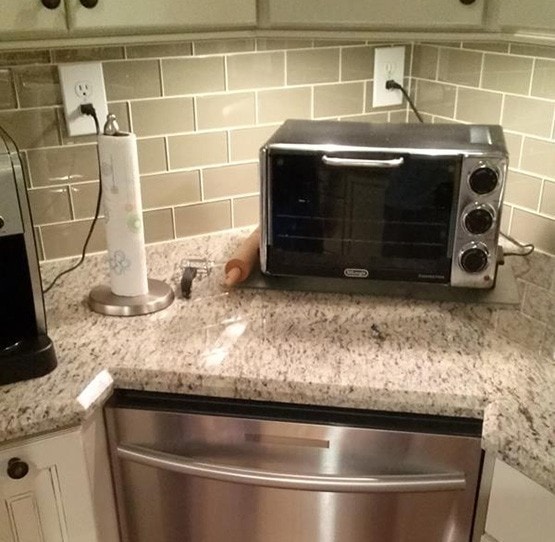
Here’s another example of good early planing (3rd picture down). The customer wanted interior cabinet lighting with glass shelving with glass doors on each side of the kitchen sink area in between the window.. Under cabinet lighting is a very nice improvement in any kitchen. It sets the mood for any occasion, not to mention it is very useful lighting when cooking and preparing food.
Exhaust Vent
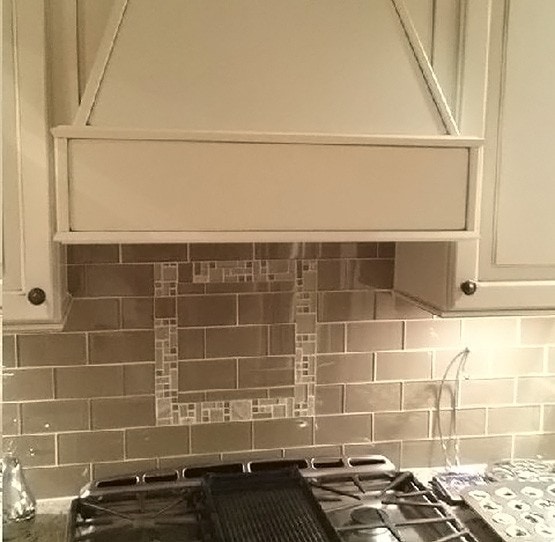
This is the exhaust vent over the stove. You can’t see it in the photo, but there is a very powerful exhaust vent unit tucked in there with lights of course. The homeowners in this home love to cook, and requested a powerful unit that exhausts outside the house.
Another nice little add on to the lower part of the upper cabinets is the addition of the bottom trim piece that was later added on to give this kitchen a bit more character.
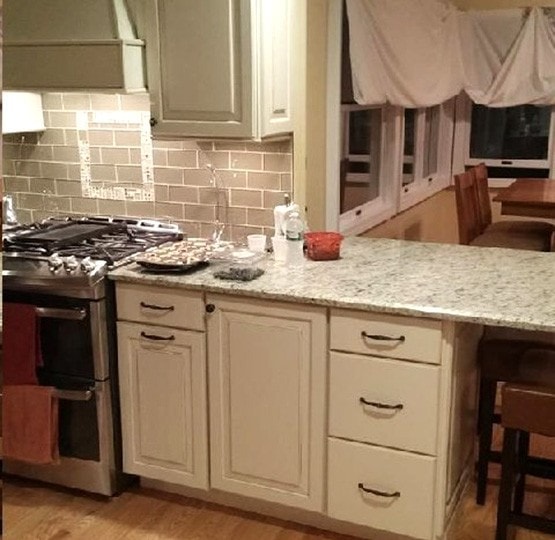
Lower Cabinets
The lower cabinets in this kitchen were a lot harder to install than they would appear. Now the problem we encountered during the construction was completely unforeseen during the planning stages of the project. When we removed the old cabinetry, we also removed the old tile flooring in the kitchen & dining room area. We installed a pre-finished hardwood floor. Now what we didn’t see, was the fact that this floor was out of level by up to 3/4 of an inch! To make matters even worse, the adjoining floor into the dining area also had a heave in it which raised it up even more right in the middle of the kitchen & dining area. So we removed the sub flooring in that area and repaired the bad framing issues underneath.
The problem wasn’t fully repaired in the kitchen area, because it would have entailed some major renovation work to do so. So what we had to do, was custom fit all the base cabinets in place. That meant cutting the bottoms of the base cabinets to accommodate that 3/4 inch rise in the floor area. Now this flaw in the floors ended up costing us extra working days on the project that was not foreseen in the early planning stages, but the important thing is we went the distance to correct what we could to make this kitchen beautiful. All these base cabinets had to be level when we were done so that the granite counter tops would sit properly and at the same heights.
In the end, the customer had a beautiful kitchen that their family could enjoy for years to come.

Kitchen Renovation in Stratford Connecticut
Now kitchens can be very deceptive. When you’re in a show room at any location, you’re looking at a finished product. Now you as a consumer are envisioning this kitchen in your home kitchen remodeling ct. The transition from ordering all these components to the install in your home is quite another. If you take a close look at how cabinets are manufactured, boxed and shipped to your location, you’ll see that all these components are in many many different boxes.
This Stratford Connecticut kitchen you are looking at here took up an entire garage bay, and took 3 hours to unpack and identify all the parts for their placement in the new kitchen. Each part has to be inspected for damage which is quite common. Any damaged parts need to be phoned in for replacement immediately so that were not delayed any longer than we must be on the project. We always try to have all the kitchen components on the job site before we start any construction just for this reason.
Regardless of what color or style cabinetry you chose, cabinetry will have to be properly mounted to the walls straight & level, and the same scenario is required for the base cabinets. Factory type cabinetry only offer so many standard sizes for an application. Now take a close look at the crown molding set up on this particular kitchen. You can’t see it, but we actually raised the top of these cabinets 1 inch to accommodate the crown molding detail for a much better esthetic appearance. Now crown molding has to be cut & fit into place and NAILED in place. Now in the process of nailing, nails almost always leave a hole that needs to be filled. This creates a problem on the finish of the cabinets that needs attention. ADCS has a great selection of cabinets when you choose to do your kitchen refacing in CT with us.
When we ordered these cabinets, we also ordered a pint of finish paint from the factory so that we have proper touch up material for any nail holes or any other discrepancies that might have arose during our installation. Now we also can’t just take that material from the can and touch it up with a paint brush! We will always duplicate HOW the factory provided that finish for these tasks, so that the repairs are identical to what the factory finish is. This how we create a perfect kitchen for you. There is a TON of detail work that goes into a kitchen replacement project that you would never imagine goes on. This is where a lot of installers get into to trouble, because they were simply unprepared for the little things that mean so much, because you’re expecting a perfect kitchen just like what you saw in the show room where you purchased the kitchen.
Good use of Tight Space
If you take a look at the 2nd picture down, here you can see a nice example of a good use of tight space. Instead of a lazy-susan type cabinet that would usually go into this space, we installed a dish washer. If you look at he cabinetry surrounding this unit, you’ll notice is was custom built for this installation out of the same material the cabinets were manufactured with. We did this simply by ordering extra material to build this unit that surrounds the dishwasher.
Another quick note; If you look at the lower part of the upper cabinet, you’ll see how much room was available to mount the crown mold to, which happens to be the same on the top of the cabinet which why we added an inch of material to the upper cabinet which made it look a lot better!
The Benefits of Early Planning on your Kitchen Remodel
Here’s another example of good early planing (3rd picture down). The customer wanted interior cabinet lighting with glass shelving with glass doors on each side of the kitchen sink area in between the window.. Under cabinet lighting is a very nice improvement in any kitchen. It sets the mood for any occasion, not to mention it is very useful lighting when cooking and preparing food.
Exhaust Vent
This is the exhaust vent over the stove. You can’t see it in the photo, but there is a very powerful exhaust vent unit tucked in there with lights of course. The homeowners in this home love to cook, and requested a powerful unit that exhausts outside the house.
Another nice little add on to the lower part of the upper cabinets is the addition of the bottom trim piece that was later added on to give this kitchen a bit more character.
Lower Cabinets
The lower cabinets in this kitchen were a lot harder to install than they would appear. Now the problem we encountered during the construction was completely unforeseen during the planning stages of the project. When we removed the old cabinetry, we also removed the old tile flooring in the kitchen & dining room area. We installed a pre-finished hardwood floor. Now what we didn’t see, was the fact that this floor was out of level by up to 3/4 of an inch! To make matters even worse, the adjoining floor into the dining area also had a heave in it which raised it up even more right in the middle of the kitchen & dining area. So we removed the sub flooring in that area and repaired the bad framing issues underneath.
The problem wasn’t fully repaired in the kitchen area, because it would have entailed some major renovation work to do so. So what we had to do, was custom fit all the base cabinets in place. That meant cutting the bottoms of the base cabinets to accommodate that 3/4 inch rise in the floor area. Now this flaw in the floors ended up costing us extra working days on the project that was not foreseen in the early planning stages, but the important thing is we went the distance to correct what we could to make this kitchen beautiful. All these base cabinets had to be level when we were done so that the granite counter tops would sit properly and at the same heights.
In the end, the customer had a beautiful kitchen that their family could enjoy for years to come.